Choosing the right Aluminum Window is more than comparing frame colors or showroom prices. It affects daylight, indoor comfort, noise control, energy use, and long-term maintenance. A beautiful frame can still perform poorly if its glass, seals, or installation are unsuitable for the building.
Fenestration consultant John Straube has emphasized, “A window is part of the wall, not a separate object.” That principle deserves attention. The wall opening, local weather, orientation, and drainage design all influence window performance. A south-facing bedroom may need different glazing from a shaded hallway. A coastal home may require stronger corrosion protection. Small details matter.
This guide, “10 Tips for Buying the Right Aluminum Window,” focuses on decisions buyers can inspect and compare. We will consider thermal breaks, glass coatings, air leakage, water resistance, frame strength, hardware, warranties, and installer experience. Ask for tested performance data. Do not rely only on attractive brochures.
Look closely.
A sample frame may feel solid, yet the complete unit can behave differently after installation. I have seen buyers focus on the lowest quote and overlook flashing, perimeter sealing, and adjustment service. That mistake is easy to make. It can also become expensive.
No single Aluminum Window suits every project. Sometimes, a premium specification is unnecessary. Sometimes, saving money creates drafts, condensation, or difficult operation. The best choice balances climate, design, budget, and expected service life. Good advice should remain practical, transparent, and open to revision when site conditions change.
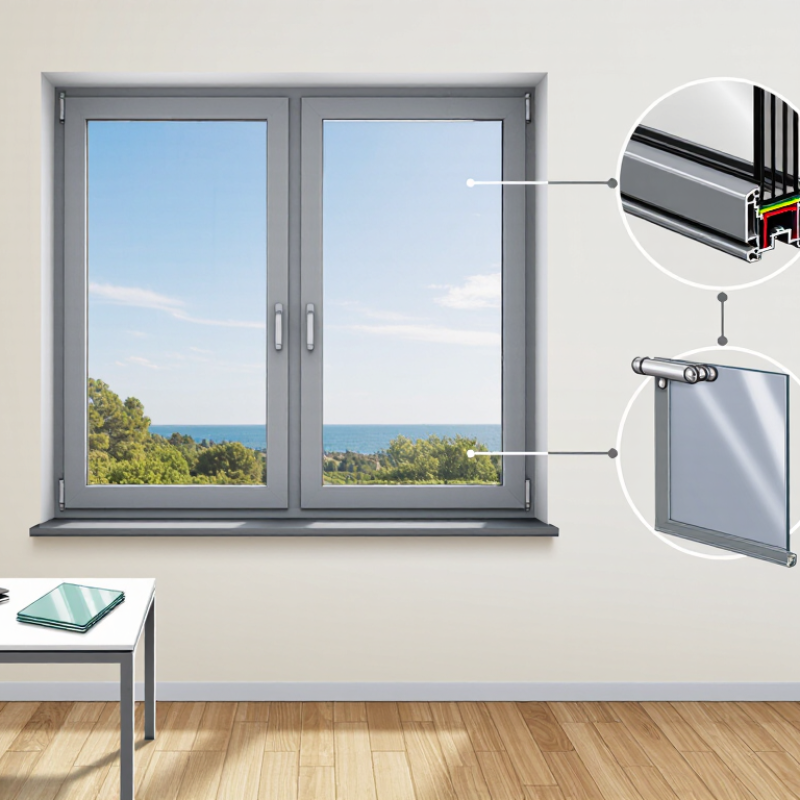
Before choosing an aluminum window, define how each room must perform. A sunny bedroom may need strong heat control, while a shaded bathroom needs privacy and ventilation. Record the opening width, height, wall thickness, and sill condition. Measure twice. Old buildings rarely stay perfectly square.
Consider your local climate and daily habits. Coastal air can accelerate corrosion, so protective finishes and drainage deserve careful attention. In noisy areas, prioritize glass thickness, seals, and frame design. If you open windows often, check handle reach and operating space. Small details affect comfort every day.
Tip: Walk through the room at different times. Notice glare, drafts, outside noise, and where rainwater collects. A quick observation can reveal more than a sales specification.
I once underestimated furniture placement near a window. The opening worked, but the handle became awkward to reach. That mistake changed how I review layouts now. Sketch furniture, curtains, insect screens, and cleaning access before ordering. Also confirm local building requirements with a qualified installer or building professional. They can verify safety, ventilation, emergency access, and proper installation methods. Ask for written performance information, not vague promises. Keep the measurements and agreed specifications together. I still leave room for correction, because renovation walls often hide surprises.
Choosing the right aluminum window starts with comparing frame types, not just prices. Standard aluminum frames are slim and strong, but they transfer heat quickly. Thermally broken frames use a polyamide barrier between the inner and outer metal sections. This reduces heat flow and improves indoor comfort. Check the frame’s U-value, but do not read it alone. The glass, spacers, seals, and installation also affect performance.
Study the profile depth and internal chambers. Deeper profiles usually provide more space for insulation and stronger hardware. Ask whether the frame suits double or triple glazing. Inspect corner joints, drainage paths, gaskets, and locking points. Small details matter during heavy rain and winter winds. An experienced installer should explain air leakage, water resistance, and wind-load ratings in clear terms. Written test data is more dependable than vague claims.
I once focused too heavily on a narrow sightline. It looked elegant, but the selected profile offered limited glazing options. That decision needed more thought. Consider the local climate, room orientation, and window size before choosing a frame. Dark finishes may absorb more solar heat, while lighter finishes can reduce surface temperatures. Thermal breaks help, but they cannot fix poor installation. Request sample sections, performance documents, and a clear warranty. Compare complete window systems, not isolated profile samples. A cheaper frame may cost more later through condensation, repairs, or wasted energy.
| Tip | Buying Factor | Common Options | Typical Characteristics | What to Compare Before Buying |
|---|---|---|---|---|
| 1 | Choose the Frame Type |
Non-thermal-break Thermal-break |
Non-thermal-break aluminum provides a direct conductive path through the frame. Thermal-break systems use a low-conductivity barrier, commonly reinforced polyamide, between the interior and exterior aluminum sections. | Select a thermal-break frame for air-conditioned, heated, or cold-climate buildings where reduced heat transfer and improved interior comfort are important. |
| 2 | Compare Profile Depth |
Narrow profiles Medium-depth profiles Deep profiles |
Deeper profiles generally provide more room for thermal barriers, seals, glazing, and drainage paths. A larger profile is not automatically better if it does not match the glass and hardware. | Compare the system depth, sash or vent depth, glazing pocket, glass thickness range, and compatibility with the required opening size. |
| 3 | Evaluate Thermal Performance |
U-value R-value Frame and whole-window ratings |
Lower U-values indicate lower heat flow and better insulation. Whole-window performance includes the frame, glass, spacers, seals, and edge effects, so it may differ from the center-of-glass value. | Request tested or calculated U-values for the complete window, not only the aluminum frame or glass. Confirm the units used, such as W/m²·K or Btu/(h·ft²·°F). |
| 4 | Select Suitable Glazing |
Double glazing Triple glazing Low-emissivity coating Laminated or tempered glass |
Insulating glass units reduce conductive heat transfer. Low-emissivity coatings help control radiant heat, while laminated and tempered glass can improve safety and impact resistance for suitable applications. | Compare glass thickness, air or inert-gas fill, low-emissivity coating position, visible light transmission, solar heat-gain control, and safety-glazing requirements. |
| 5 | Inspect Thermal-Break Quality |
Continuous polyamide barrier Multi-chamber thermal barrier Insulated glazing pocket |
A continuous, properly assembled thermal barrier limits heat flow through the frame. The barrier width and frame geometry affect performance, but the complete window assembly determines the final result. | Ask for the thermal-barrier material, barrier width, assembly method, and thermal test data. Check that the barrier is continuous around corners and opening sections. |
| 6 | Check Air and Water Tightness |
Compression seals Brush seals Multi-point sealing systems Weep drainage |
Effective seals reduce uncontrolled air leakage. Properly designed drainage channels and weep holes allow incidental water to exit instead of collecting inside the frame. | Compare independently tested air-infiltration and water-penetration results. Verify that drainage paths remain open after installation and are suitable for the local exposure level. |
| 7 | Match the Opening Style |
Fixed Casement Awning Sliding Tilt-and-turn |
Fixed and hinged windows often achieve tighter compression sealing than basic sliding windows. Sliding systems can save space and are convenient, but their rollers, tracks, and interlocks require careful design. | Consider ventilation needs, wind exposure, cleaning access, available operating space, emergency-egress requirements, and the maximum recommended sash dimensions. |
| 8 | Review Structural Capacity |
Standard sections Reinforced sections Structural mullions and transoms |
Wind load, glass weight, panel dimensions, and building height influence the required section strength. Larger openings may require reinforced profiles or additional framing. | Request design calculations or tested limits for wind pressure, deflection, glass weight, maximum panel size, mullion span, and anchoring conditions. |
| 9 | Compare Surface Finishes |
Anodized finish Powder coating Fluoropolymer coating |
Anodizing forms a durable oxide layer. Powder coating provides a colored protective finish. High-performance architectural coatings may be specified for demanding exposure, depending on the project requirements. | Compare coating thickness, color consistency, corrosion resistance, warranty terms, cleaning requirements, and suitability for coastal, industrial, or high-UV environments. |
| 10 | Verify Installation Details |
Proper shimming Perimeter sealing Thermal continuity Correct sill flashing |
Even a high-performing window can lose efficiency or resist water poorly if it is out of square, poorly anchored, or incorrectly sealed. Installation quality affects air leakage, water management, and long-term operation. | Confirm rough-opening dimensions, sill drainage, compatible sealants, anchor spacing, perimeter insulation, frame alignment, and final operation testing after installation. |
Evaluate Glass Options, Energy Efficiency, and Weather Resistance
Tip 1: Start with the glass, not the frame. Double glazing can reduce heat transfer and outside noise. In colder rooms, choose low-emissivity glass with insulated spacers. In sunny climates, a lower solar heat gain coefficient can limit indoor overheating. Clear glass may look bright, but it can make a room uncomfortable.
Tip 2: Compare published U-values and air-leakage ratings. Lower U-values generally indicate better insulation. Ask whether the rating covers the complete window, not only the glass. I once focused too much on frame appearance and overlooked poor seals. That mistake was expensive to correct. Check the edge seals, gaskets, and locking points closely.
Tip 3: Test weather resistance for your actual location. Look for reliable water penetration, wind-load, and air-infiltration test results. A window near a coast needs durable finishes and careful drainage design. Heavy rain should move through weep paths, not collect inside the frame. Installation matters just as much. Even a high-performing window can leak when the opening is uneven or poorly sealed.
Tip 4: Inspect a sample before ordering. Open and close it several times. Feel for binding, rattling, or sharp edges. Small details matter. Energy ratings are useful, but they cannot reveal every installation problem. I still leave room for doubt, because real weather is less predictable than a laboratory test.
Buying the right aluminum window requires more than comparing frame color and price. Check the hardware before making a decision. Handles should feel solid, turn smoothly, and return neatly to position. Hinges and rollers must support the sash without scraping the frame. Small resistance matters. Ask whether replacement parts remain available after installation.
Security depends on several details working together. Look for strong locking points, reinforced corners, and durable glass retention. A narrow gap around the closed sash can weaken both comfort and protection. Do not assume a heavy handle means a secure window. I once accepted a neat-looking sample with weak corner joints; that mistake taught me to inspect hidden areas, not only polished surfaces. Request clear performance information and verify it with a qualified professional.
Installation affects everything. The opening should be measured at several points, because older walls are rarely perfectly square. A trained installer must level the frame, seal perimeter gaps, and confirm smooth operation before leaving. Poor sealing can cause drafts, water stains, or premature corrosion around fasteners. After installation, clean tracks with a soft brush and mild water. Avoid harsh chemicals. Check seals, drainage holes, and hardware twice a year. Maintenance is simple. I still tend to postpone it, especially in busy seasons, and that habit deserves correction.
10 Tips for Buying the Right Aluminum Window
Cost should include more than the quoted frame price. Ask for installation, flashing, delivery, disposal, and future maintenance in writing. The U.S. Department of Energy reports that windows can cause 25–30% of household heating and cooling energy use. A cheaper window may cost more when poor air sealing increases indoor discomfort. Tip: Compare whole-life cost, not only the invoice.
Request the NFRC label for every proposed window. It reports tested U-factor, solar heat gain coefficient, and visible transmittance. Lower U-factor usually means better insulation, while SHGC should match your climate and window orientation. FGIA certification can also support claims about tested performance and manufacturing quality. Still, certification does not guarantee perfect installation. That detail is often overlooked. Check the warranty carefully. Confirm coverage periods, labor limits, glass exclusions, finish protection, and transfer conditions. A ten-year frame warranty may offer little value if labor ends after one year.
Supplier reliability deserves the same scrutiny as technical performance. Ask for recent project references, written lead times, spare-parts policies, and a named service contact. The U.S. Energy Information Administration’s residential energy data shows that space heating and cooling remain major household energy uses, making installation quality important. Inspect sample corners, drainage paths, seals, and thermal breaks before ordering. One practical mistake is trusting attractive samples without checking documentation. Keep every promise in the contract. Expect delays, but require honest notice. No checklist catches everything.
Record the width, height, wall thickness, and sill condition. Measure twice. Old walls are often uneven, so leave room for correction.
A sunny bedroom may need strong heat control. A shaded bathroom may need privacy and ventilation. Daily habits matter too.
Check glare, drafts, outside noise, and rainwater paths at different times. Sketch furniture, curtains, screens, and cleaning access. Small details matter.
Double glazing can reduce heat transfer and outside noise. Low-emissivity glass suits colder rooms. Lower solar heat gain can help sunny rooms stay cooler.
Compare published U-values and air-leakage ratings. Lower U-values generally mean better insulation. Confirm the rating covers the complete window, not just the glass.
Inspect edge seals, gaskets, and locking points closely. Open and close the sample several times. Watch for binding, rattling, or awkward handles.
Request water penetration, wind-load, and air-infiltration test results. Check drainage and weep paths. Rainwater should move out, not collect inside the frame.
Yes. An uneven opening or weak seal can cause leaks, even with a well-rated window. Ask a qualified installer to verify safety and installation methods. Laboratory results are useful, but real weather is less predictable.
Choosing the right Aluminum Window begins with clearly defining your project needs, including window size, style, location, ventilation goals, and budget. Compare frame materials, profile designs, and thermal break options to understand how they affect strength, insulation, appearance, and long-term comfort. Glass selection is equally important, so consider double or triple glazing, low-emissivity coatings, solar control, sound reduction, and resistance to rain, wind, and temperature changes.
Before making a decision, inspect the quality of hardware, locks, hinges, seals, and other security features. Confirm that installation will be completed by qualified professionals and learn what maintenance the window requires. Finally, compare total costs rather than focusing only on the initial price. Review warranties, product certifications, delivery terms, and the supplier’s experience and reliability. A careful evaluation of these factors will help you choose an Aluminum Window that provides lasting performance, energy efficiency, security, and value for your building.